
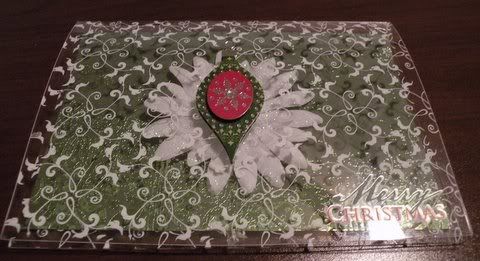
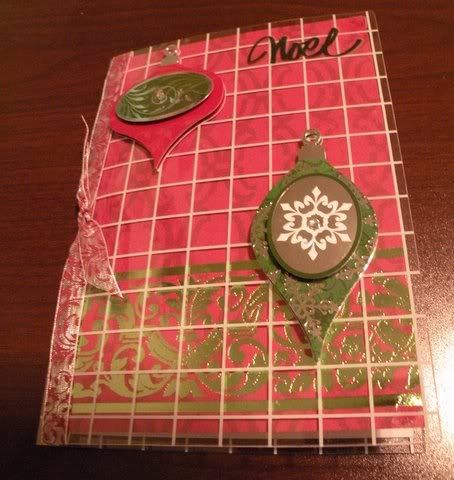
Today's Idea comes from Barb who will be sharing tips on making Acrylic Cards!
Acrylic cards may be purchased at your local stores and online in packs of 8 and 12 with or without envelopes. They come in colors as well as clear along with patterns and plain. You can make any type card with your left over scraps and embellishments. Below are a few tips on making an acrylic cards.
#1 Remember to peel off the covering over the card. Check both outside and inside as some companies put a covering over both.
#2 Before adhering any paper or embellishment, wipe any obvious fingerprints off, using your photo cloth.
#3 After cutting your desired paper (remember you do not have to cover the entire card) Place it where you want it to go. Remember paper may be placed on the inside or outside of the card.
#4 Before applying glue, remember there are time you will glue on the pattern side if your placement requires it. Example: If your paper is on the inside front cover your glue would be placed on the pattern side of the paper
#5 You need only a small amount of glue in each corner and sometimes in the bottom sides and top middle area so your paper will lay smooth. The Glue I prefer is ZIP DRY paper glue. It dries quick and clear.
#6 You may now add any embellishments you wish such as chipboard pieces, ribbon, stickers and flowers. You may also stamp on acrylic cards. I use Staz-On, you may use any color
#7 I like to pop some embellishment up. Use a regular pop dot, if embellishment has any adhesive on it, place pop dot and don't forget to baby powder around it to remove the adhesive you don't want touching the card.


2 comments:
Beautiful cards Barb! Way to go!
This card is gorgeous BARB! Wow!
:J
Post a Comment