
 Today's project is brought to you by Amanda
Supply List: - Cardboard Box - Patterned papers are from SEI's Alpine Frost collection: creme, through the woods, rim frost, and forest floor - MM paints:spotlight, honeydew, and specialty glaze in pearl - Green Gems (Creative Cafe) - White Glitter Thickers (American Crafts, "Sprinkles") - Green glass beads (Joannes) - Brown Glitter (Pink Paislee Pixee Stix) - String of small pearls (wrapped around netting) - Light green netting (used to hang sign) - Crop-a-Dile (used to punch 2 holes in cardboard for netting) - Paint brush - Pop-dots - Scrappy Glue* * I used Scrappy Glue to adhere everything in my project. I wasn't convinced that photo splits or a herma would adhere well to cardboard. You will also need a pair of precision scissors for this project.
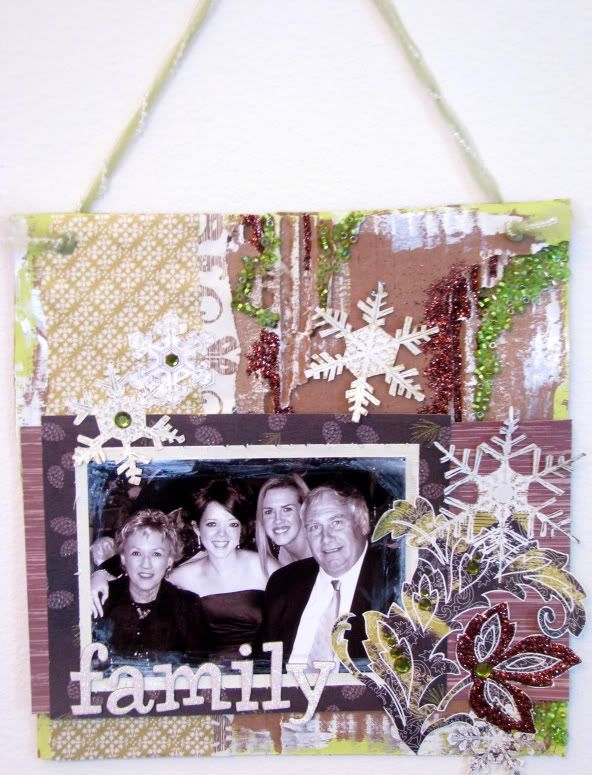
Dimensions for cardboard sign: 10 inches by 10 inches
Holes were made 1 inch from the outer edge of the cardboard. My project is not a step-by-step type of project. It can be done however you like, using whatever embellishments you prefer. Below are some techniques I used for my sign. This would make a great gift or a great decoration for your home. You could hang it on a wall or on a door. To give my sign a more rustic, raw appearance, I peeled the outer layer of cardboard from the surface. This exposed the corrugated portion of the box, leaving a ridged texture in certain areas.
To add some visual interest and added texture, I painted the edges and some of the corrugate portions with MM paint. I then added beads in places and brown glitter as well. Sparkle and shine are a must for Christmas projects! For my picture, I used an edge distresser (actually I've lost my Heidi Swapp edge distresser, so I simply used the sharp edge of my scissors) on the inner-most mat. I then brushed some MM specialty glaze in pearl on the edges of my picture, to soften the look.
I pop-dotted some of my snowflakes to add some dimension.
Tips on how to wrap a string of beads around netting. I tied a knot at the end of my string of pearls and netting to make wrapping a little easier. I also went ahead and punched my two holes in my sign so I could put one end of the wrapped netting through the hole so it would hold steady and secure. I then wrapped my beads around my netting and put the second end through my other hole and tied the second knot so the knot side was exposed and facing outward (see pictures on the messageboard).
I hope my tips and information helped. Please let me know if you have any questions! Happy Scrapping!


1 comment:
Very pretty! I love it!
:J
Post a Comment